plotRangeDetection
Syntax
Description
plotRangeDetection(
displays object detections on a bird's-eye-plot from a list of ranges, azimuthal fields of
view, sensor mounting locations, and angles. rangeDetPlotter,ranges,fovs,locations,angles)plotRangeDetection
displays each object detection as an arc whose radius is the corresponding range value, with
arc length proportional to the azimuthal field of view of the sensor. The mounting locations
and angles of the sensor determine the center of the arc.
The range detection plotter, rangeDetPlotter, is associated with a
birdsEyePlot object and configures the display
of the specified detections.
To remove all detections associated with detection plotter
rangeDetPlotter, call the clearData
function and specify rangeDetPlotter as the input argument.
plotRangeDetection(
displays detections and their labels on a bird's-eye plot in addition to all input arguments
from the previous syntax.rangeDetPlotter,ranges,___,labels)
Examples
Generate Ultrasonic Detections of Multiple Vehicles
Use a simulated ultrasonic sensor to generate detections for multiple vehicles in a driving scenario.
Create Driving Scenario
Create a driving scenario containing a three-lane road using lane specifications.
scenario = drivingScenario;
roadCenters = [-120 30 0;-60 0 0;0 0 0; 60 0 0; 120 30 0];
lspc = lanespec(3);
road(scenario,roadCenters,Lanes=lspc);
Create an ego vehicle that travels in the center lane at a velocity of 30 m/s.
egovehicle = vehicle(scenario,ClassID=1);
egopath = [1.5 0 0; 60 0 0; 111 25 0];
egospeed = 30;
smoothTrajectory(egovehicle,egopath,egospeed);
Add a target vehicle that travels ahead of the ego vehicle at 30.5 m/s in the right lane, and changes lanes close to the ego vehicle.
ftargetcar = vehicle(scenario,ClassID=1);
ftargetpath = [8 2; 60 -3.2; 120 33];
ftargetspeed = 30.5;
smoothTrajectory(ftargetcar,ftargetpath,ftargetspeed);
Add a second target vehicle that travels in the left lane at 32m/s.
ltargetcar = vehicle(scenario,ClassID=1);
ltargetpath = [-5.0 3.5 0; 60 3.5 0; 111 28.5 0];
ltargetspeed = 32;
smoothTrajectory(ltargetcar,ltargetpath,ltargetspeed);
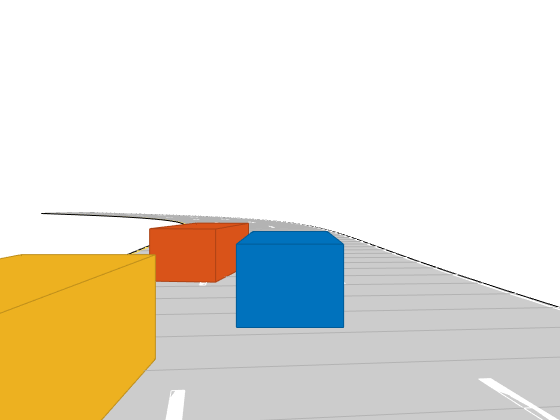
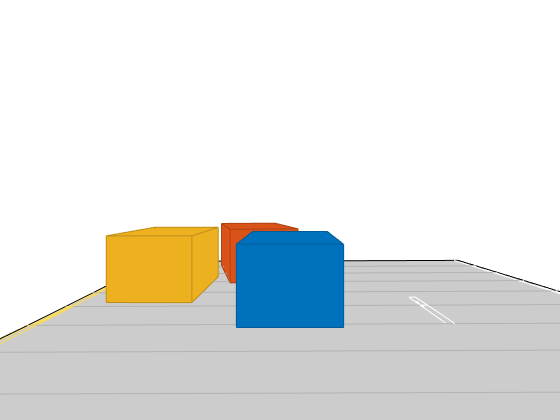
Display a chase plot from behind the ego vehicle for a 3D view of the scenario..
chasePlot(egovehicle)

Create Ultrasonic Sensors
Create an ultrasonic sensor mounted at the front of the ego vehicle.
frontUltrasonic = ultrasonicDetectionGenerator(1,FieldOfView=[70 35]);
frontUltrasonic.Profiles = actorProfiles(scenario);
Create a second ultrasonic sensor mounted on the left side of the ego vehicle.
leftUltrasonic = ultrasonicDetectionGenerator(2,MountingLocation=[0.5 1 0.2],MountingAngles=[90 0 0],FieldOfView=[70 35]);
leftUltrasonic.Profiles = actorProfiles(scenario);
Create Bird's-Eye-Plot
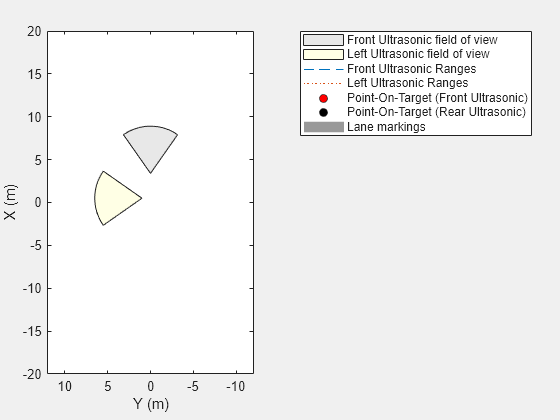
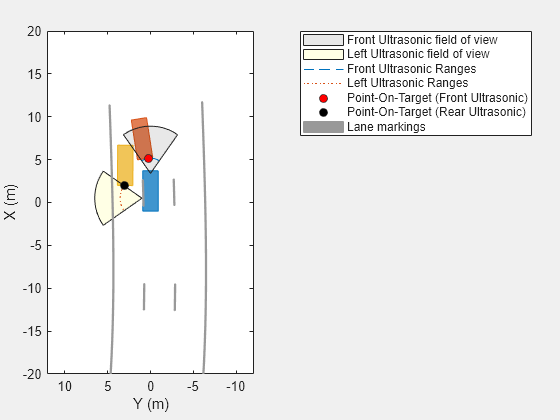
Create a bird's-eye-plot for visualizing the sensor data. Add plotters for visualizing the ultrasonic coverage areas, detections, and points on targets. Use a rangeDetectionPlotter object to visualize ultrasonic detections as arcs and a detectionPlotter object to visualize the closest points on the target as markers. Add plotters to display the lane markings and vehicle outlines.
% Create bird's eye plot
bep = birdsEyePlot(XLim=[-20 20],YLim=[-12 12]);

% Plotters for Coverage areas of two ultrasonic sensors
fcaPlotter = coverageAreaPlotter(bep,DisplayName="Front Ultrasonic field of view");
plotCoverageArea(fcaPlotter,frontUltrasonic.MountingLocation(1:2), ...
  frontUltrasonic.DetectionRange(3),frontUltrasonic.MountingAngles(1),frontUltrasonic.FieldOfView(1));

lcaPlotter = coverageAreaPlotter(bep,DisplayName="Left Ultrasonic field of view",FaceColor="y");
plotCoverageArea(lcaPlotter,leftUltrasonic.MountingLocation(1:2), ...
  leftUltrasonic.DetectionRange(3),leftUltrasonic.MountingAngles(1),leftUltrasonic.FieldOfView(1));

% Range Detection Plotters for Ultrasonic Detections
frdPlotter = rangeDetectionPlotter(bep,DisplayName="Front Ultrasonic Ranges");
lrdPlotter = rangeDetectionPlotter(bep,DisplayName="Left Ultrasonic Ranges",LineStyle=":");

% Detection plotters for closest points on targets
fdetPlotter = detectionPlotter(bep,DisplayName="Point-On-Target (Front Ultrasonic)",MarkerFaceColor="r");
ldetPlotter = detectionPlotter(bep,DisplayName="Point-On-Target (Rear Ultrasonic)",MarkerFaceColor="k");

% Plotters for vehicle and target outlines, lane markings
olPlotter = outlinePlotter(bep);
lmPlotter = laneMarkingPlotter(bep,DisplayName="Lane markings");

Run the Simulation and Generate Detections
Run the scenario simulation. At each timestep:
Obtain the ground truth target poses, and generate detections for the two ultrasonic sensors.
Obtain and display the target outlines and lane markings.
When there are valid detections, display the detections and the corresponding points-on-targets generated by the ultrasonic sensor.
while advance(scenario)

    tgtpose = targetPoses(egovehicle);

    [fobdets,fisValid] = frontUltrasonic(tgtpose,scenario.SimulationTime);
    [lobdets,lisValid] = leftUltrasonic(tgtpose,scenario.SimulationTime);

    [objposition,objyaw,objlength,objwidth,objoriginOffset,color] = targetOutlines(egovehicle);
    plotOutline(olPlotter,objposition,objyaw,objlength,objwidth, ...
        OriginOffset=objoriginOffset,Color=color)

    [lmv,lmf] = laneMarkingVertices(egovehicle);
    plotLaneMarking(lmPlotter,lmv,lmf)

    if ~isempty(fobdets) && fisValid
        franges = fobdets{1}.Measurement;
        plotRangeDetection(frdPlotter,franges,frontUltrasonic.FieldOfView(1),frontUltrasonic.MountingLocation,frontUltrasonic.MountingAngles)
        plotDetection(fdetPlotter,fobdets{1}.ObjectAttributes{1}.PointOnTarget(1:2)')
    end

    if ~isempty(lobdets) && lisValid
        lranges = lobdets{1}.Measurement;
        plotRangeDetection(lrdPlotter,lranges,leftUltrasonic.FieldOfView(1),leftUltrasonic.MountingLocation,leftUltrasonic.MountingAngles)
        plotDetection(ldetPlotter,lobdets{1}.ObjectAttributes{1}.PointOnTarget(1:2)')
    end
end


Input Arguments
rangeDetPlotter — Range detection plotter
rangeDetectionPlotter object
Range detection plotter, specified as a rangeDetectionPlotter
object. This object is stored in the Plotters property of a birdsEyePlot object and configures the display of the specified detections
in the bird's-eye plot. To create this object, use the rangeDetectionPlotter function.
ranges — Range values of detected objects
1-by-M real-valued vector
Range values of detected objects, specified as a 1-by-M real-valued vector. M is the number of detected objects. Each range value is the distance from the sensor to the detected object in vehicle coordinates. The range values are plotted as arcs whose radii are the corresponding range values, with arc lengths proportional to the azimuthal fields of view values of the sensors. Units are in meters.
fovs — Azimuthal fields of view of sensors
360 (default) | 1-by-M real-valued vector
Azimuthal fields of view of the sensors, specified as an 1-by-M
real-valued vector. Each element is the azimuthal field of view of the sensor that
measured the corresponding range value in ranges. Units are in
degrees.
locations — Mounting locations of sensors
[0 0 0] (default) | M-by-3 real-valued matrix
Mounting locations of the sensors, specified as an M-by-3
real-valued matrix. Each row is the mounting location of the sensor that measured the
corresponding range value in ranges, and is of the form
[x
y
z]. Units are in meters.
angles — Mounting angles of sensors
[0 0 0] (default) | M-by-3 real-valued matrix
Mounting angles of the sensors, specified as an M-by-3
real-valued matrix. Each row is the mounting angle of the sensor that measured the
corresponding range value in ranges, and is of the form
[zyaw
ypitch
xroll]. Units are in degrees.
labels — Detection labels
M-element string array | M-element cell array of character vectors
Detection labels, specified as an M-element string array or
M-element cell array of character vectors. M is
the number of detected objects. The labels correspond to the locations in the
ranges vector. By default, detections do not have labels. To
remove all annotations and labels associated with the detection plotter, use the
clearData
function.
Version History
Introduced in R2022a
MATLAB Command
You clicked a link that corresponds to this MATLAB command:
Run the command by entering it in the MATLAB Command Window. Web browsers do not support MATLAB commands.

Select a Web Site
Choose a web site to get translated content where available and see local events and offers. Based on your location, we recommend that you select: .
You can also select a web site from the following list
How to Get Best Site Performance
Select the China site (in Chinese or English) for best site performance. Other bat365 country sites are not optimized for visits from your location.
Americas
- América Latina (Español)
- Canada (English)
- United States (English)
Europe
- Belgium (English)
- Denmark (English)
- Deutschland (Deutsch)
- España (Español)
- Finland (English)
- France (Français)
- Ireland (English)
- Italia (Italiano)
- Luxembourg (English)
- Netherlands (English)
- Norway (English)
- Österreich (Deutsch)
- Portugal (English)
- Sweden (English)
- Switzerland
- United Kingdom (English)
Asia Pacific
- Australia (English)
- India (English)
- New Zealand (English)
- 中国
- 日本Japanese (日本語)
- 한국Korean (한국어)