Perform an Impact Analysis
About Impact Analysis
In a project, you can use impact analysis to find out the impact of changing particular files. Investigate dependencies visually and explore the structure of your project. Analyze selected or modified files to find their required files and the files they affect. Impact analysis can show you how a change affects other files before you make the change. For example, you can:
Investigate the potential impact of a change in requirements by finding the design files linked to the requirements document.
Investigate change set impact by finding upstream and downstream dependencies of modified files before committing the changes. Finding these dependencies can help you identify design and test files that need modification, and help you find the tests you need to run.
After performing dependency analysis, you can open or label the files, export the results as workspace variables, or reloadable files, or send files for custom task processing. Exporting the results enables further processing or archiving of impact analysis results.
Tip
For an example showing how to perform file-level impact analysis to find and run the tests affected by modified files, see Perform Impact Analysis with a Project.
Run a Dependency Analysis
Before running a dependency analysis on a project, make sure that you have added all your files to the project. For more information, see Add Files to the Project.
To start analyzing your project, on the Project tab, click the down arrow to expand the Tools gallery. Under Apps, click Dependency Analyzer. Alternatively, in the project Views pane, select Dependency Analyzer and click Analyze.
To analyze the dependencies of specific files, in the dependency graph, select the files. In the Impact Analysis section, click All Dependencies or use the context menu and select Find All Dependencies.
To analyze the dependencies inside add-ons, select Analyze > Add-Ons. For more details about available options, see Analysis Scope.
You can also check dependencies directly in Project. In the Project Files view, right-click the project files you want to analyze and select Find Dependencies.

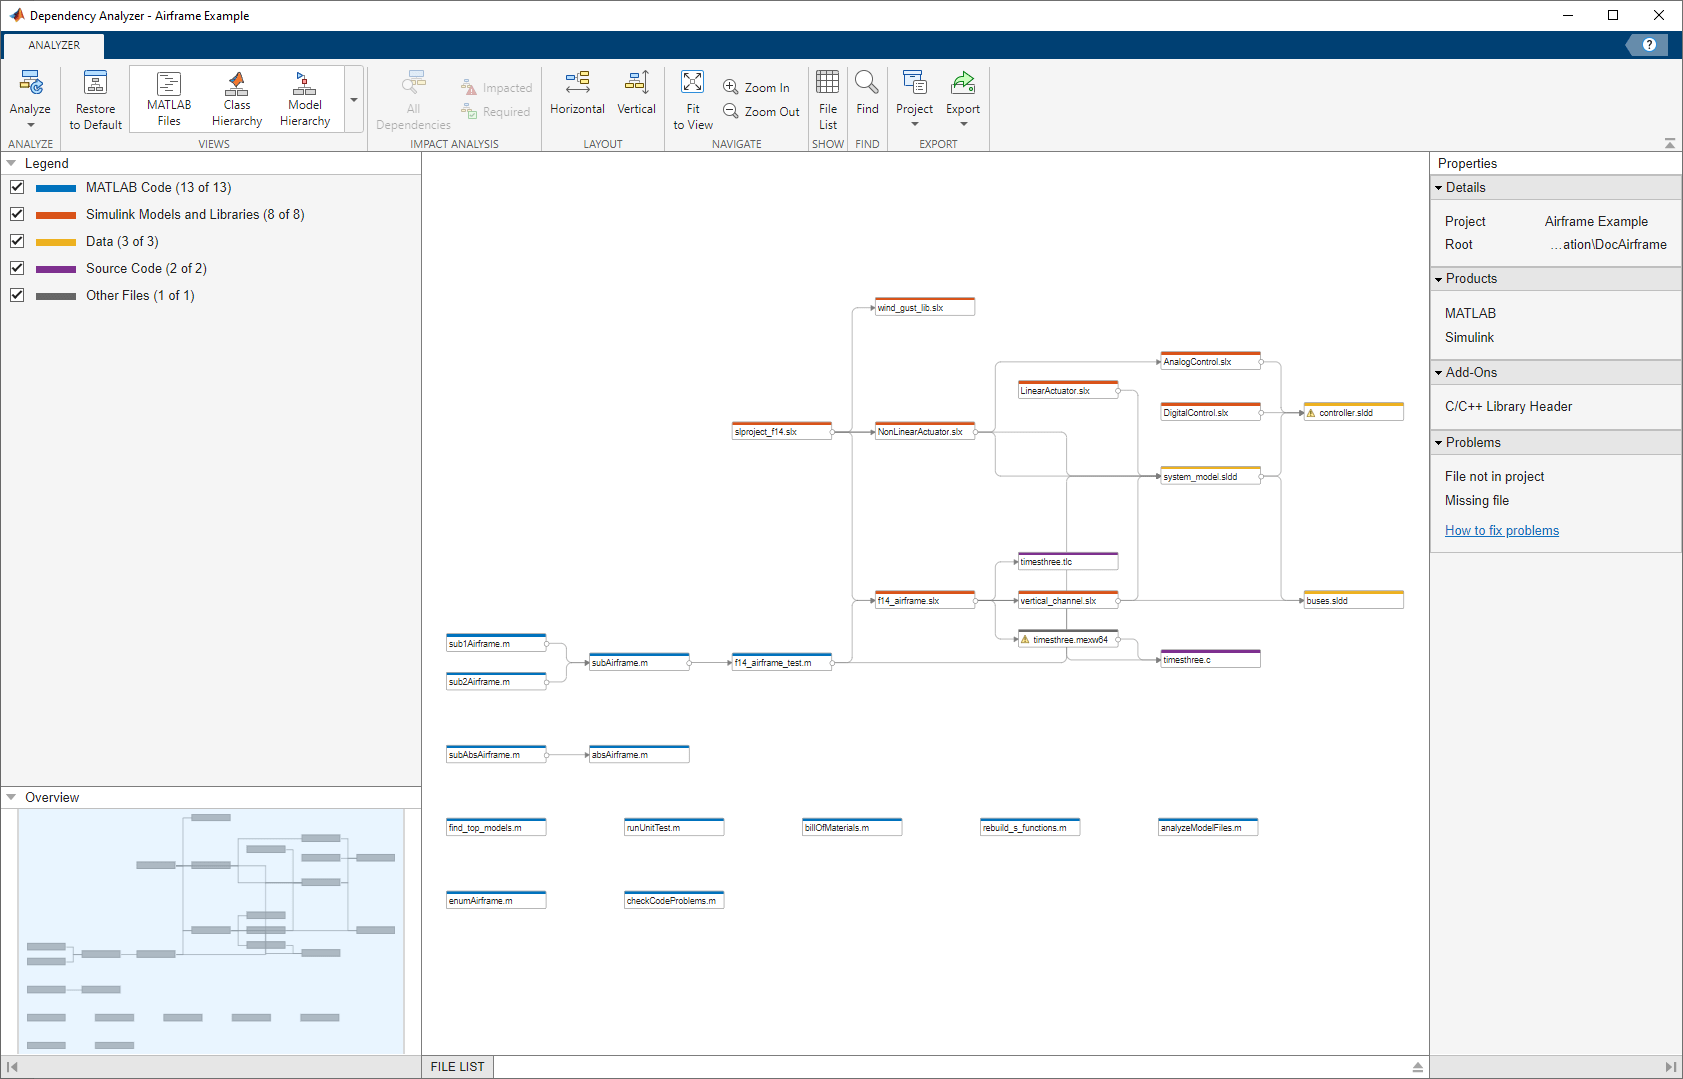
The dependency graph shows:
Your project structure and its file dependencies, including how files such as models, libraries, functions, data files, source files, and derived files relate to each other.
Required products and add-ons.
Relationships between source and derived files (such as
.mand.pfiles,.slxand.slxp,.sscand.sscp, or.cand.mexfiles), and between C/C++ source and header files. You can see what code is generated by each model, and find what code needs to be regenerated if you modify a model.Warnings about problem files, such as missing files, files not in the project, files with unsaved changes, and out-of-date derived files.
You can examine project dependencies and problem files using the File List. In the toolstrip, click File List.
After you run the first dependency analysis of your project, subsequent analyses incrementally update the results. The Dependency Analyzer determines which files changed since the last analysis and updates the dependency data for those files. However, if you update add-ons or installed products and want to discover dependency changes in them, you must perform a complete analysis. To perform a complete analysis, in the Dependency Analyzer, click Analyze > Reanalyze All.
For next steps:
Tip
To try a dependency analysis on example files, see Perform Impact Analysis with a Project.
Find Required Products and Add-Ons
After running a dependency analysis on a project, the graph shows the required add-ons for the whole project or for selected files. You can see which products are required to use the project or find which file is introducing a product dependency.
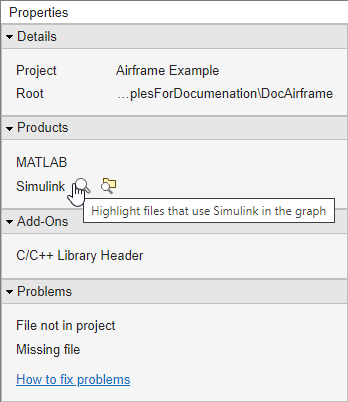
In the Dependency Analyzer, in the Properties pane, the Product section displays the required products for the whole project. To view products required by a specific file, select a file by clicking the graph.
To find which file is introducing
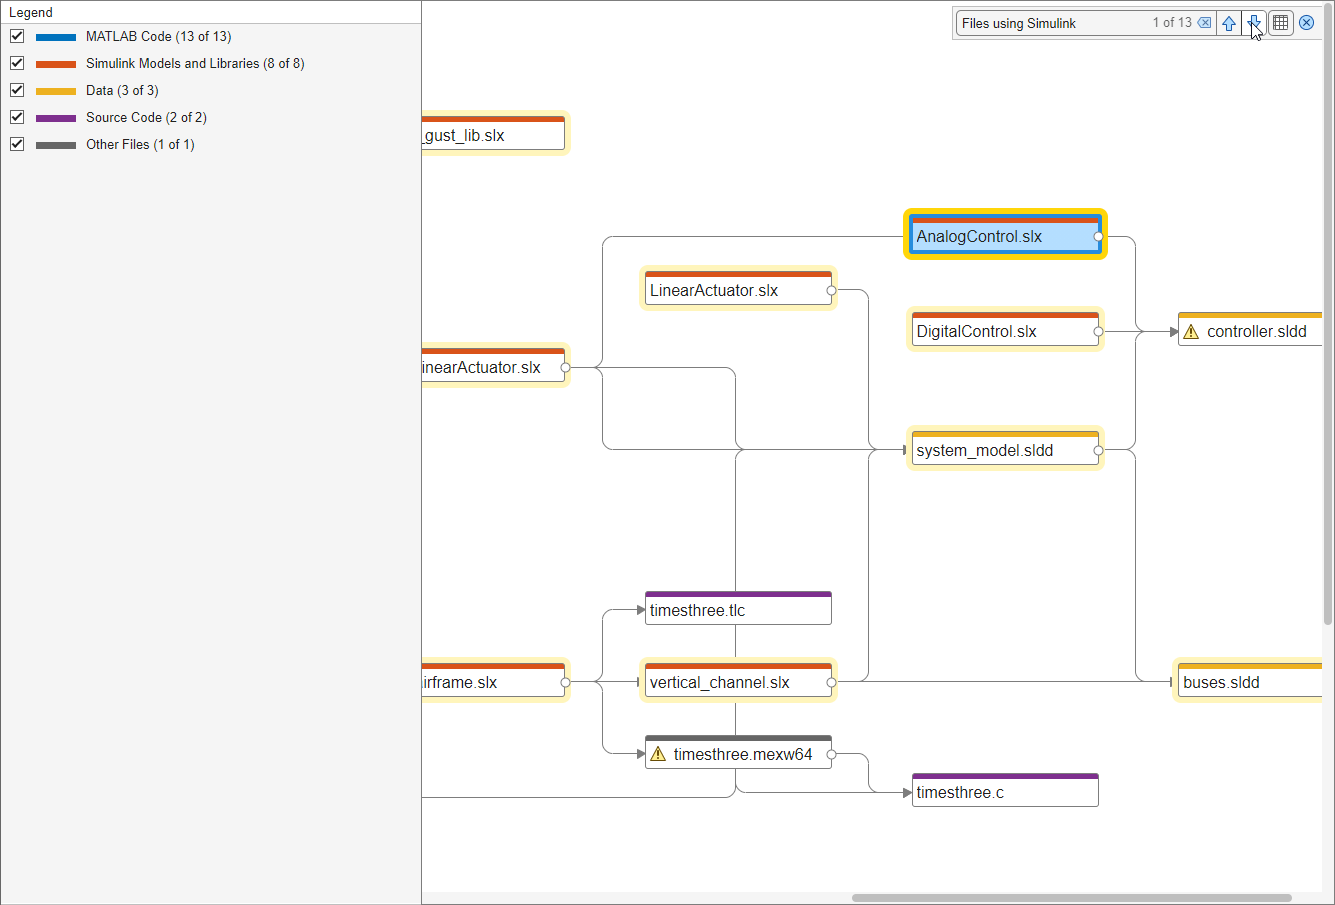
a product dependency, point to the product name and click the magnifying glass icon
![]() . The graph highlights the files that use the
selected product.
. The graph highlights the files that use the
selected product.

To go through these files, use the arrows in the search box (e.g., Files
using "productName").
To undo the highlighting, close the search box.

To investigate further, you can list the files that use a product and examine
where the dependency is introduced. In the Products section, in
the Properties pane, point to a product and click the search
folder icon ![]() .
.
If a required product is missing,
the products list labels it as missing. The product is also listed in the
Problems section as
productName not installed.
To resolve a missing product, install the product and rerun the dependency
analysis.
Find Dependencies of Selected Files
After a dependency analysis, to find out the impact of particular files, select files in the dependency graph use the context menu, or use controls in the legend, View and Impact Analysis sections of the Dependency Analyzer. You can simplify the graph by investigating dependencies of particular files.
To investigate the dependencies of a file after running a dependency analysis, in the dependency graph, select a file.
In the Impact Analysis section, click All Dependencies. The graph shows the selected file and all its dependencies.
To show only files needed by the selected file to run properly, click Required.
To show only files impacted by a potential change to the selected file, click Impacted.
Finding these dependencies can help you identify the impact of a change and identify the tests you need to run to validate your design before committing the changes.
To investigate the dependencies of multiple files, click files while holding the Shift key. The Impact Analysis section displays how many files are selected.

To reset the graph, click the filter at the top of the graph. For example, if you
had filtered by files impacted by f14_airframe.slx, click ![]() .
.
Investigate Impact of Modified Files
To examine the impact of the changes you made on the rest of the project files, perform an impact analysis on the modified files in your project.
In the Views section, select the Source Control view. The graph colors the files by their source control status. The modified files are in light blue.
Select all the modified files in the graph.
Alternatively, add all modified files to selection by clicking the Add to selection icon of an item in the Legend pane.
Tip
If you changed a large number of files, you can also use the file list.
In the Dependency Analyzer toolstrip, click File List. Point to Status and click the arrow to sort the list by the source control status. Select all the modified files.

In the Impact Analysis section, click Impacted. Alternatively, use the context menu and select Find Impacted.
Identify Tests to Run
To identify the tests you need to run to validate your design before committing the changes, use the Classification view when you perform an impact analysis on the file you changed.

In the Views section, select the Classification view. The graph colors the files by their project label.
Select the file you changed, for example
f14_airframe.slx.In the Impact Analysis section, click Impacted. Alternatively, use the context menu and select Find Impacted.
The example graph shows four tests you need to run to qualify the change made to
f14_airframe.slx.
