Get Started with Deep Network Designer
This example shows how to use Deep Network Designer to adapt a pretrained GoogLeNet network to classify a new collection of images. This process is called transfer learning and is usually much faster and easier than training a new network, because you can apply learned features to a new task using a smaller number of training images. To prepare a network for transfer learning interactively, use Deep Network Designer.
Extract Data for Training
In the workspace, unzip the data.
unzip('MerchData.zip');Select a Pretrained Network
Open Deep Network Designer.
deepNetworkDesigner
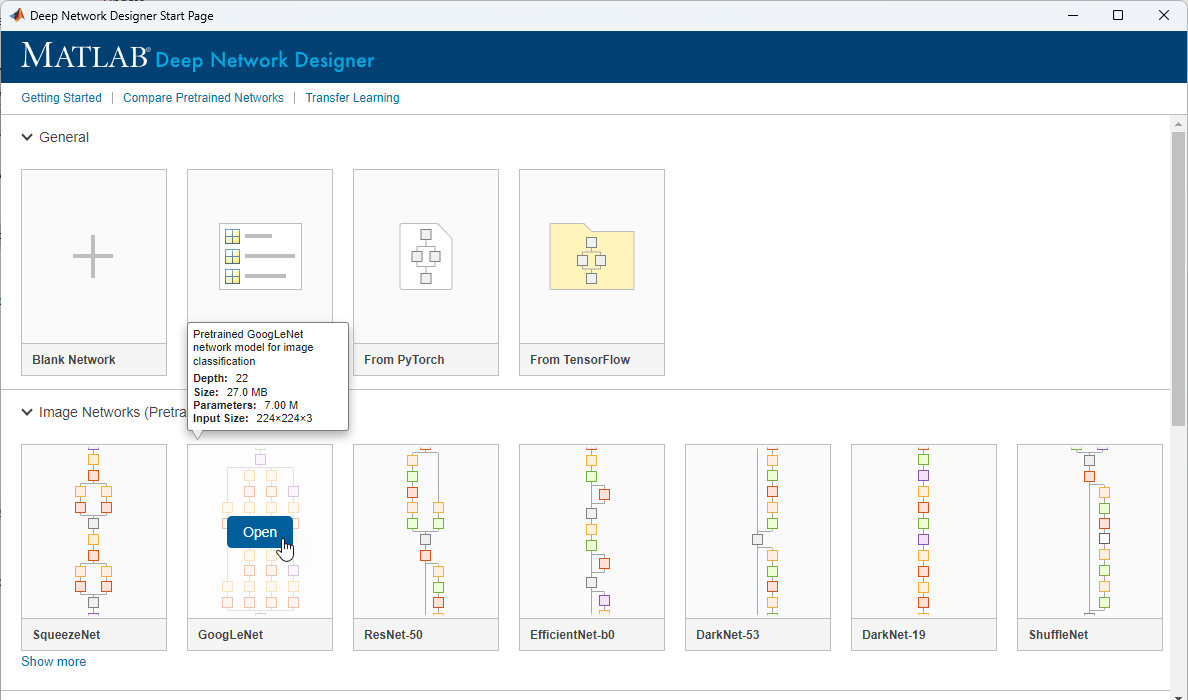
Load a pretrained GoogLeNet network by selecting it from the Deep Network Designer Start Page. If you need to download the network, then click Install to open the Add-On Explorer.
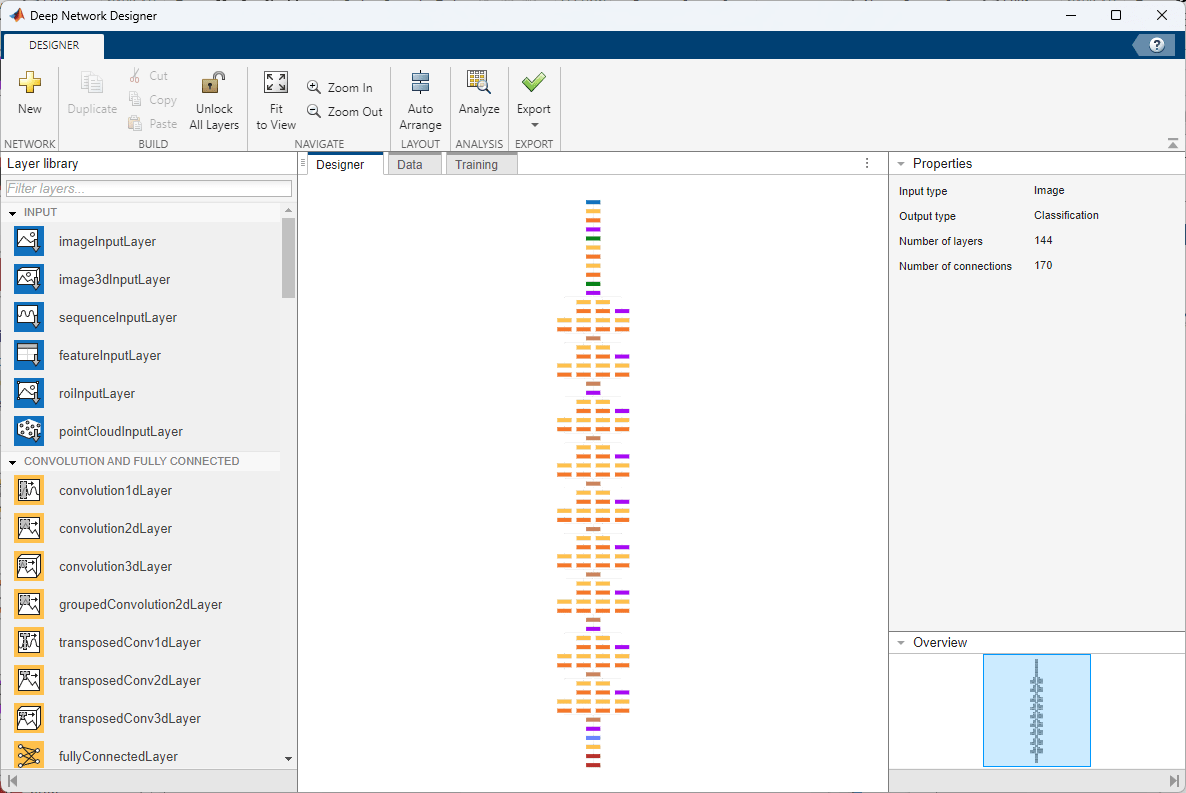
Deep Network Designer displays a zoomed-out view of the whole network. Explore the network plot. To zoom in with the mouse, use Ctrl+scroll wheel.
Load Data Set
To load the data into Deep Network Designer, on the Data tab, click Import Data > Import Image Classification Data.
In the Data source list, select Folder. Click Browse and select the extracted MerchData folder.
The dialog box also allows you to split the validation data from within the app. Divide the data into 70% training data and 30% validation data.
Specify augmentation operations to perform on the training images. For this example, apply a random reflection in the x-axis, a random rotation from the range [-90,90] degrees, and a random rescaling from the range [1,2].
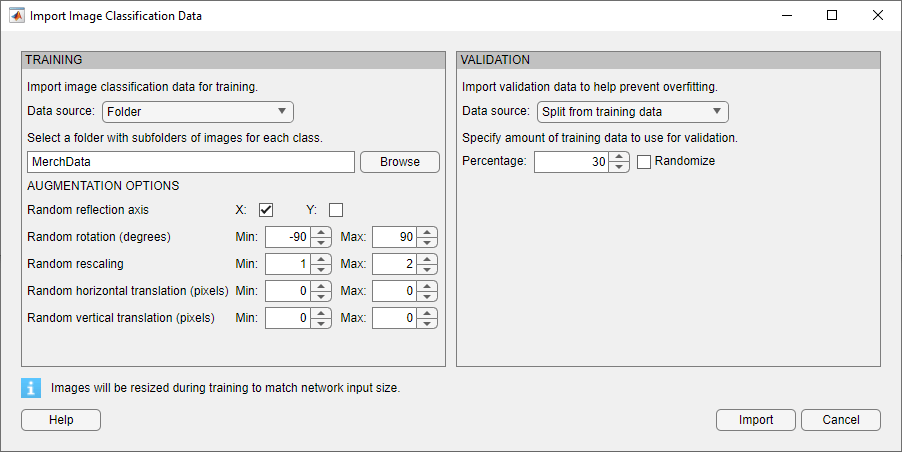
Click Import to import the data into Deep Network Designer.
Using Deep Network Designer, you can visually inspect the distribution of the training and validation data in the Data tab. You can see that, in this example, there are five classes in the data set. You can also view random observations from each class.
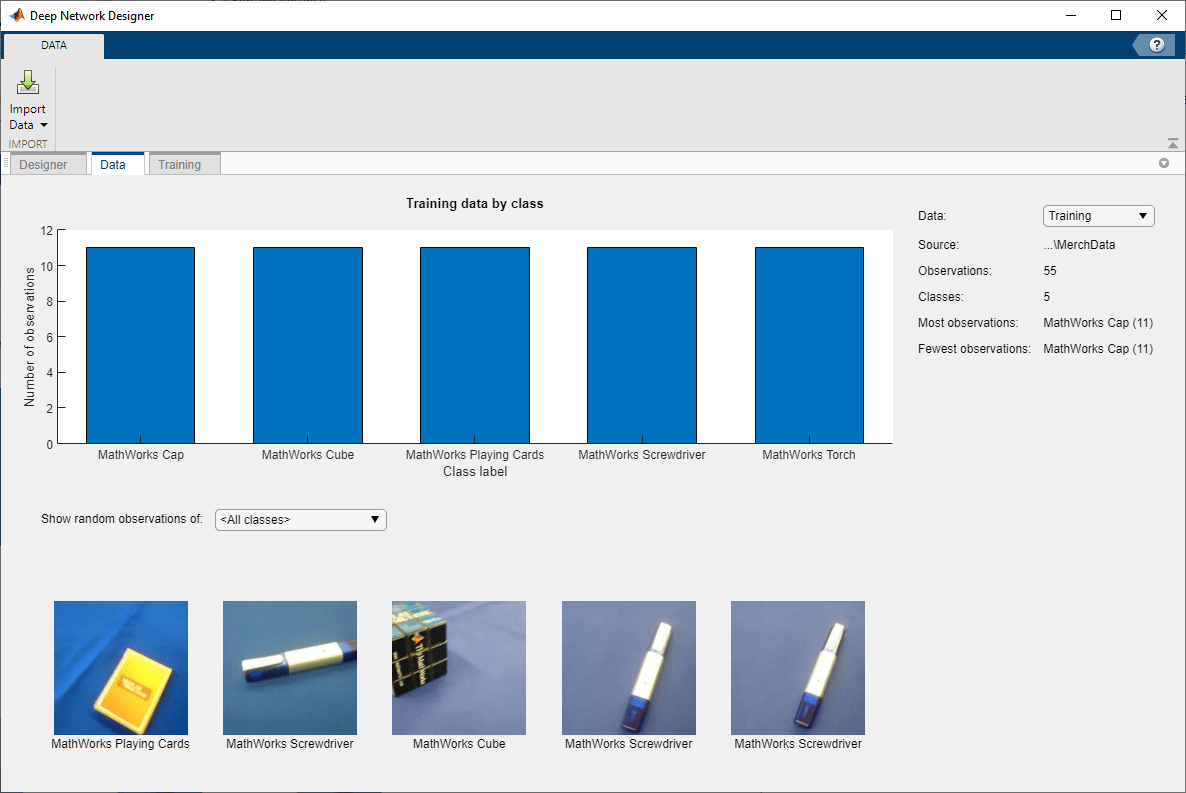
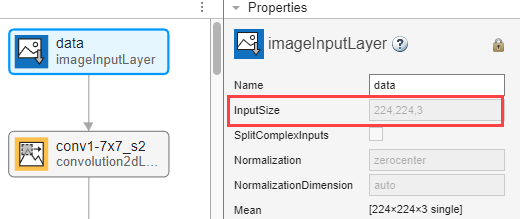
Deep Network Designer resizes the images during training to match the network input size. To view the network input size, in the Designer tab, click the imageInputLayer. This network has an input size of 224-by-224.
Edit Network for Transfer Learning
To retrain a pretrained network to classify new images, adapt the last learnable layer and the final classification layer to the new data set. In GoogLeNet, these layers have the names 'loss3-classifier' and 'output', respectively.
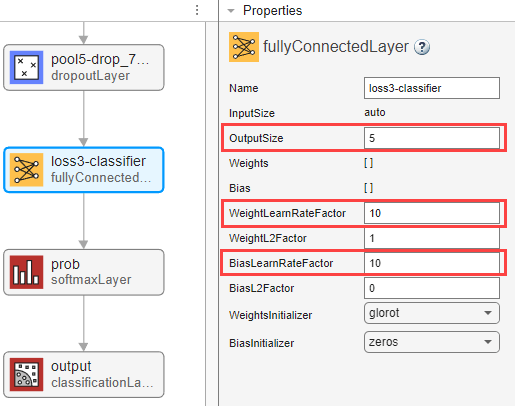
In the Designer tab, click the final fully connected layer, 'loss3-classifier'. At the bottom of the Properties pane, click Unlock Layer. In the warning dialog that appears, click Unlock Anyway. This unlocks the layer properties so that you can adapt them to your new task.
Before R2023b: To edit the layer properties, you must replace the layers instead of unlocking them.
Set the OutputSize to the number of classes in the new data, in this example, 5.
Edit learning rates to learn faster in the new layers than in the transferred layers. Set WeightLearnRateFactor and BiasLearnRateFactor to 10.
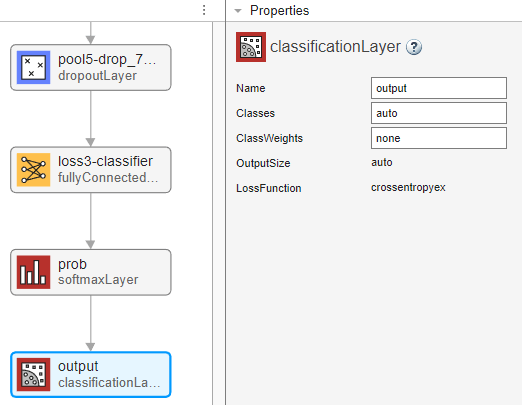
Select the classification layer, 'output', and click Unlock Layer and then click Unlock Anyway. For the unlocked output layer, you do not need to set the OutputSize. At training time, Deep Network Designer automatically sets the output classes of the layer from the data.
Check Network
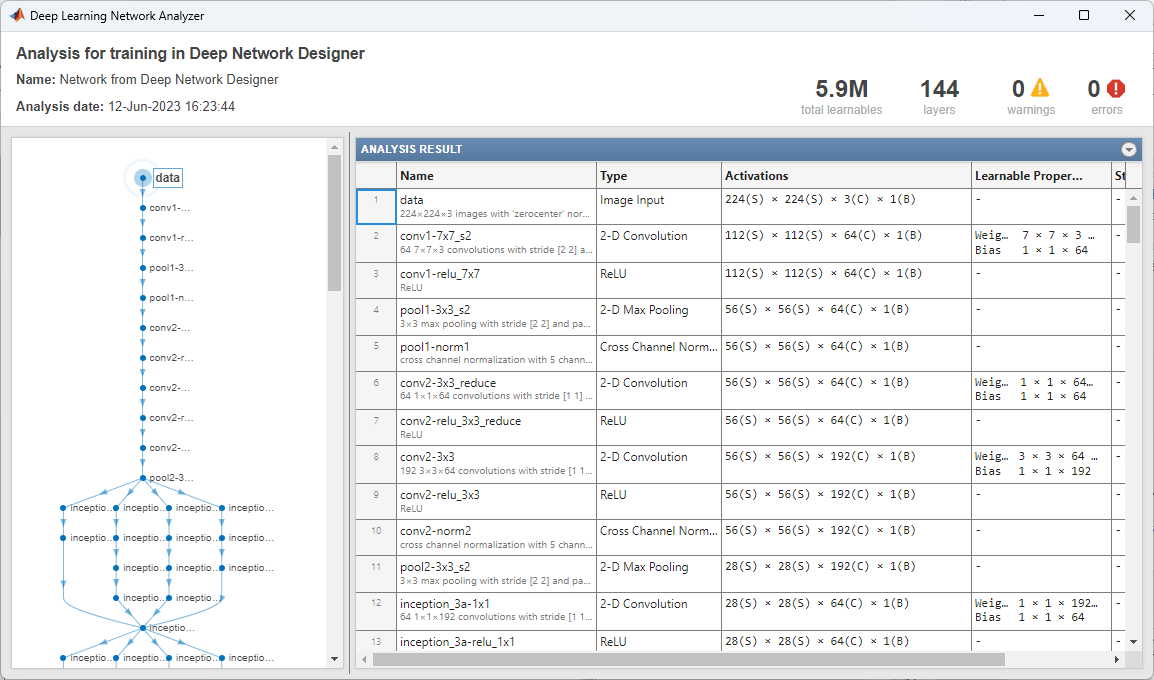
Check your network by clicking Analyze. The network is ready for training if Deep Learning Network Analyzer reports zero errors.
Train Network
To train the network with the default settings, on the Training tab, click Train.
If you want greater control over the training, click Training Options and choose the settings to train with. The default training options are better suited for large data sets. For small data sets, use smaller values for the mini-batch size and the validation frequency. For more information on selecting training options, see trainingOptions.
For this example, set InitialLearnRate to 0.0001, MaxEpochs to 8, and ValidationFrequency to 5. As there are 55 observations, set MiniBatchSize to 11 to divide the training data evenly and ensure the whole training set is used during each epoch.
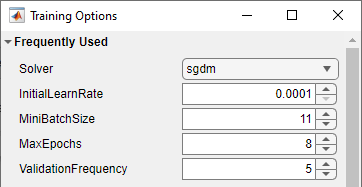
To train the network with the specified training options, click OK and then click Train.
Deep Network Designer allows you to visualize and monitor the training progress. You can then edit the training options and retrain the network, if required.
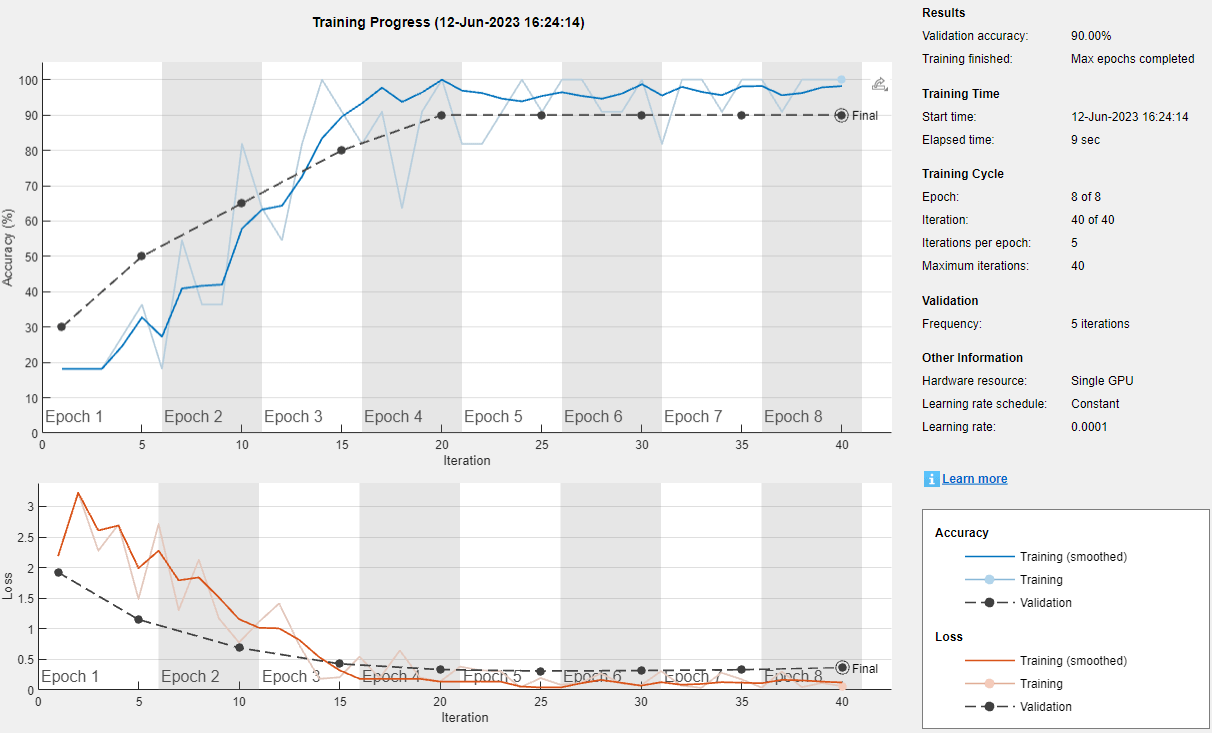
Export Results from Training
To export the results from training, on the Training tab, select Export > Export Trained Network and Results. Deep Network Designer exports the trained network as the variable trainedNetwork_1 and the training info as the variable trainInfoStruct_1.
You can also generate MATLAB code, which recreates the network and the training options used. On the Training tab, select Export > Generate Code for Training.
Test Trained Network
Select a new image to classify using the trained network.
I = imread("MerchDataTest.jpg");Resize the test image to match the network input size.
I = imresize(I, [224 224]);
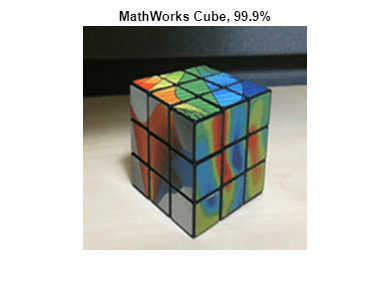
Classify the test image using the trained network.
[YPred,probs] = classify(trainedNetwork_1,I);
imshow(I)
label = YPred;
title(string(label) + ", " + num2str(100*max(probs),3) + "%");
For more information, including on other pretrained networks, see Deep Network Designer.
